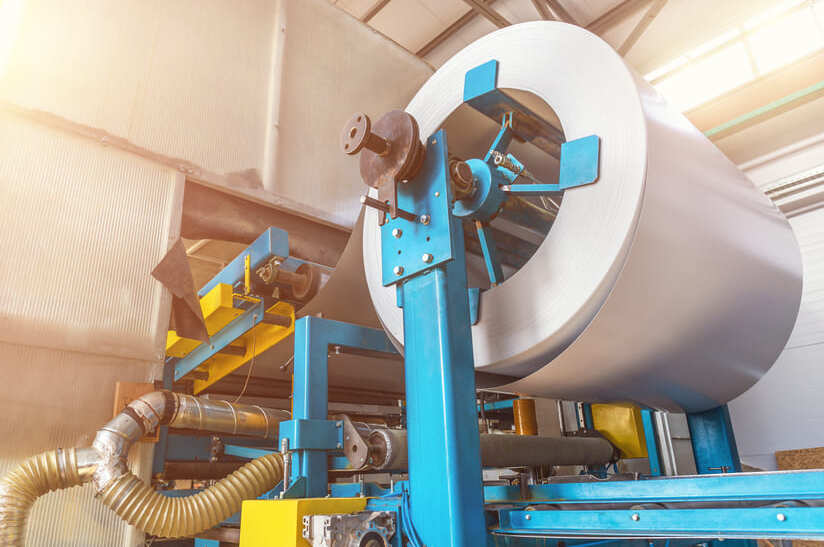
The following article discusses the technological leap a surface inspection system with four or more optical arrangements can make as part of intelligent hardware. New perspectives are opened up, putting modern quality assurance in a new light.
This article was originally published in the 1/23 issue of MPT International. Author is Christian Reidler, Sales Manager, Dr. Schenk Industriemesstechnik.
Surface inspection systems for quality monitoring are standard practice in modern steel mills and a fixed feature in almost every strip processing line. The basic design of these systems is identical: cameras with suitable lighting technology record digital signals from the metal strip. Hard-coded algorithms process these signals into images that an automated classifier evaluates and decides, with some uncertainty, exactly what the system might have detected. In addition to reliable detection, the high accuracy of the classifier is a basic requirement for successful quality assurance. At first glance, intelligent software should perform this task to our satisfaction. However, reality often teaches us otherwise—much to the displeasure of the users—no matter how intelligent the software appears.
“Critical or non-critical?”
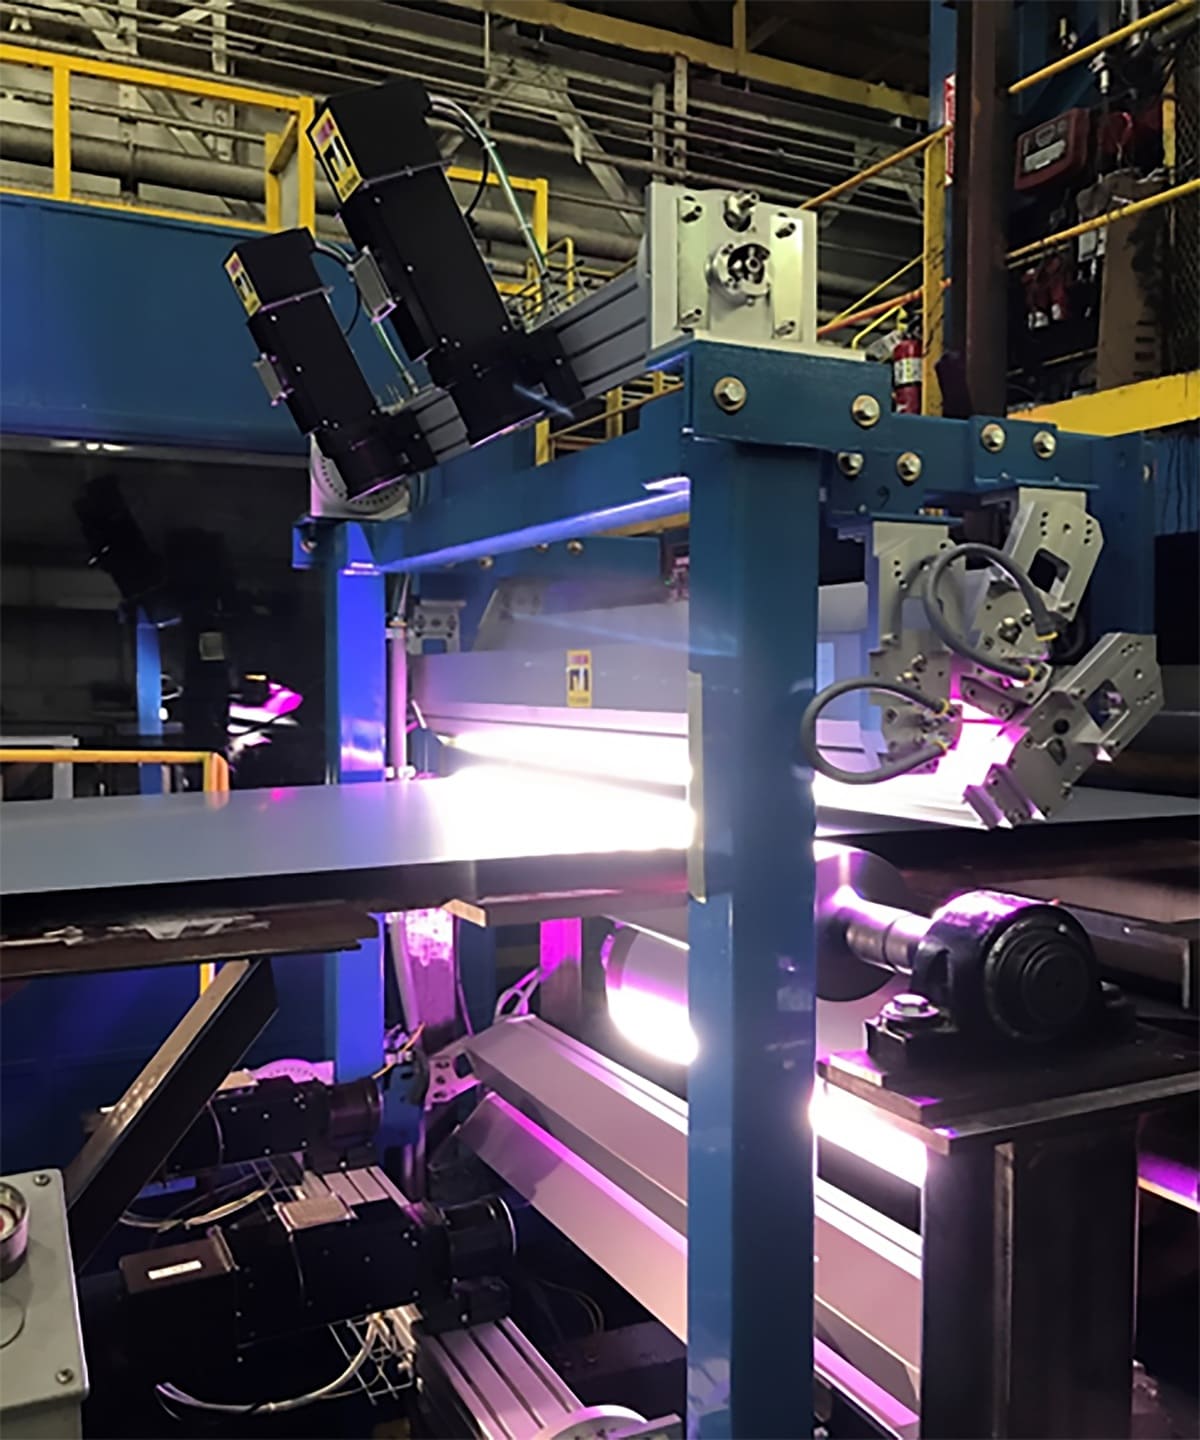
Figure 1: Camera-based surface inspection system with corresponding LED lighting technology on a galvanising line.
“We have to become more efficient” was a common phrase on the management floor of the manufacturing industry for years—long before the energy crisis. Systems for assessing the efficiency in the production process and, ultimately, the product quality are enjoying sustained high demand. An example of such a system is shown in Figure 1.
This system records the galvanised steel strip over its entire surface and searches for quality-relevant surface defects. If the system detects a defect, it generates a high-resolution image for evaluation by intelligent software. Such
defects can be divided into three categories; depending on their type and size, they are assessed as non-critical or result in an entire coil being blocked for delivery or further processing. Some are typical contrast defects such as soiling, emulsion spots, oxide residues, etc. These are irrelevant for most production plants, as they disappear in the subsequent processing steps and only play a role in the last step of the process chain or during packaging. Nevertheless, these defects frequently occur in all production steps and must be distinguished from two other critical defect types.
The two critical defect categories are topographical defects, such as dents, bumps and open shells, and scattering defects, such as scratches or other damage in the metal strip. These defects do not disappear in the subsequent processes and will be visible in the final product. After all, who wants dents in their new car or scratches on the design elements of their kitchen?
Significant advantages through early detection
In the spirit of “we must become more efficient”, it is important to sort out defective material as early as possible in the production process. The sub-par material can still be used for less quality-relevant products, such as construction steel, and does not put unnecessary strain on the downstream processes, which are usually energy-intensive. Another significant advantage of early detection of critical defects is the ability to intervene in what appears to be a faulty process, such as a damaged roller that leaves a dent in the material with each revolution. The earlier a process defect is detected, the less material ends up in the scrap container at the end of the day. To this end, it is essential to correctly classify the defects found— i.e., classify quality-relevant defects as accurately as possible and distinguish them from less critical defects. A whole range of software is available for this purpose, from the simple application of fixed rules to neural networks, which operate under the umbrella term “artificial intelligence”.
It takes two intelligent components
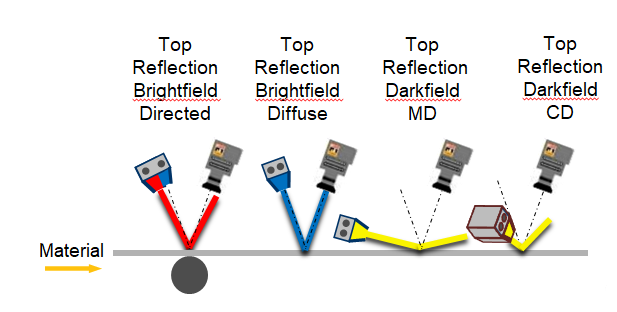
Figure 2: Schematic representation of the four optical arrangements, here to be understood as viewing angles: Bright field directional, bright field diffuse, dark field in the machine direction, and dark field transverse to the machine direction.
Any software can only work with the information content of the system-generated image, regardless of how intelligent it is. At this point, it is best to ask how a human evaluates a defect held in their hand as an A4 sample. They will tilt and turn the sample in their hand in front of their eyes, looking for the best angle to evaluate the defect. Software is incapable of that, which is where intelligent hardware comes in. Figure 2 shows four different arrangements, each with a different angle of incidence of the illumination. This presents the camera with four different angles of view of the material, similar to the intelligent method used by the human inspector. The result is not just one image of the same defect but four, which helps the system user recover their habit of looking at patterns from different angles in an automated system and increases confidence in the reliability of the inspection system. Automated software can draw on the information content from four images and does not have to make a decision based on just one image.
Quadruple information content
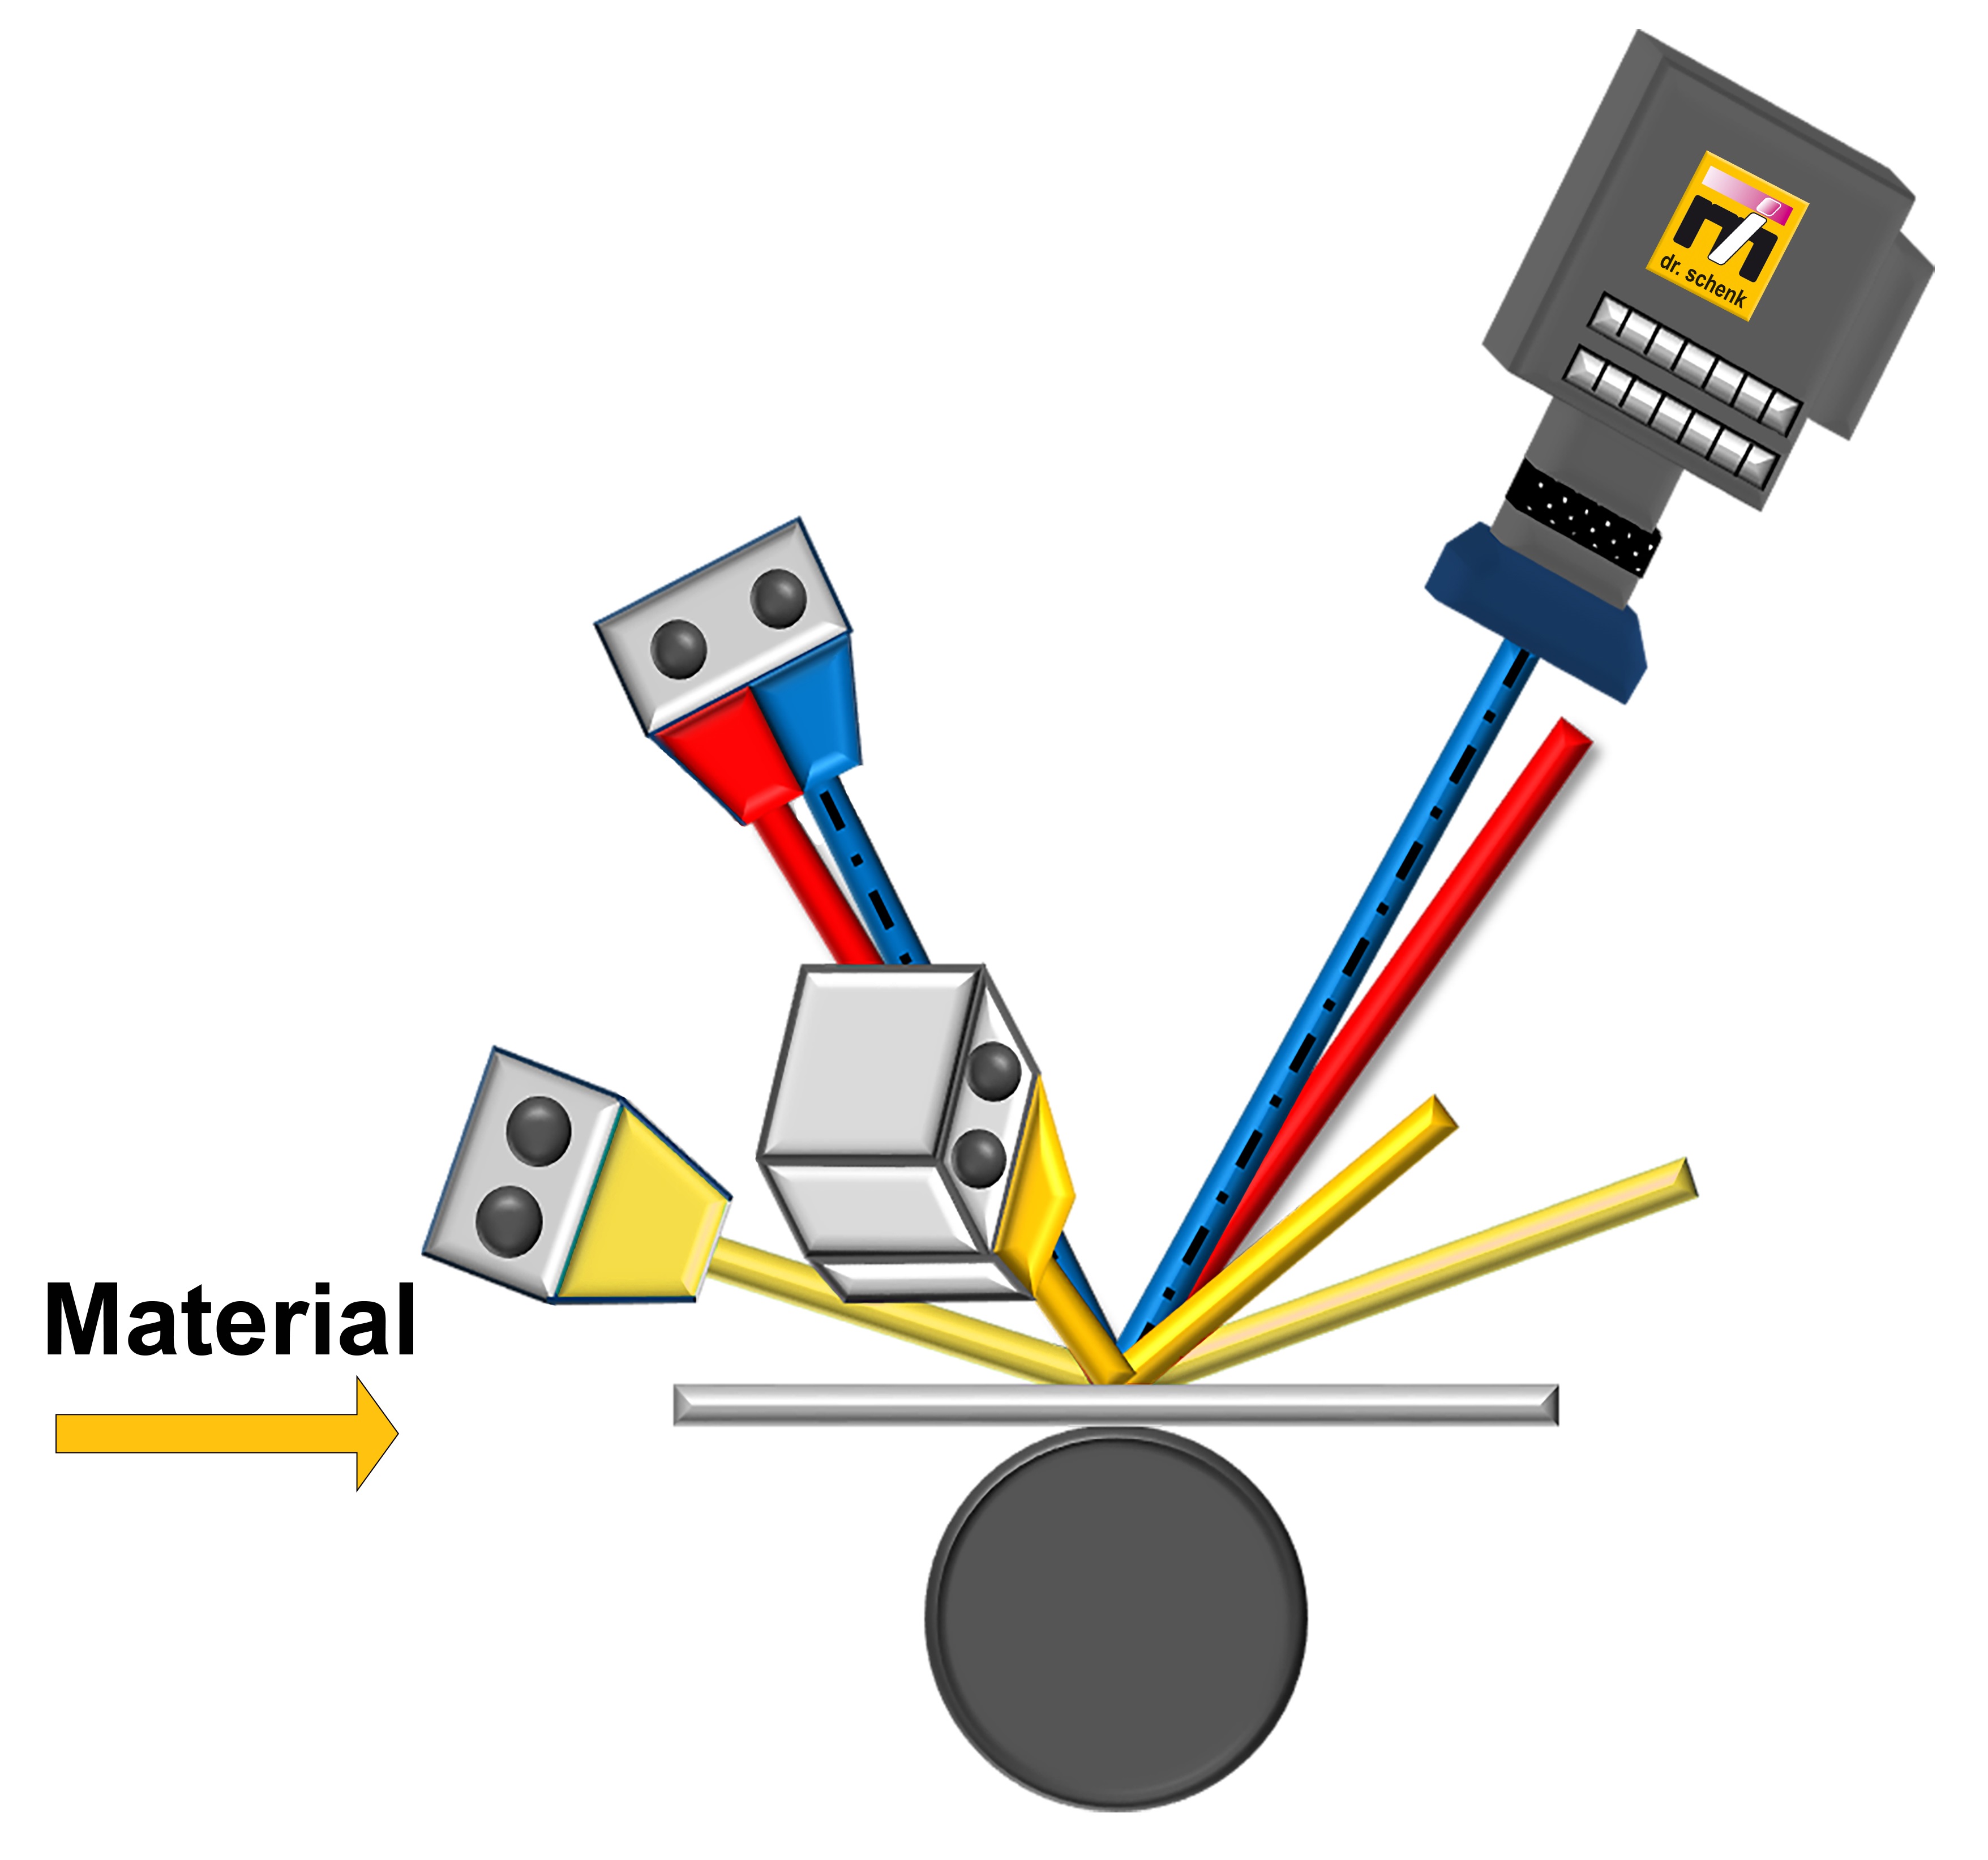
Figure 3: By sequencing the illuminations according to the scan frequency of a camera, four images of the same defect are created, quadrupling the information content for the automated classification of defects.
Figure 3 shows how an arrangement consisting of four viewing angles can be implemented in a single system. By sequencing the illuminations over time to match the scan frequency of the camera, a real-time image from four different viewing angles is guaranteed. What exactly does this method contribute to improved discrimination of critical and non-critical defects?
Figures 4 and 5 show examples of critical and non-critical defects, which can only be distinguished using one of the four available viewing angles. It is easy to imagine what would happen if these defects were reversed, such as if only one bright field diffuse and one dark field in the machine direction were available for material observation. Dents and scratches could end up in supposedly high-quality material, while defect-free material is blocked for further processing or even scrapped. This is extremely counterproductive for efficiency, especially in the metal industry, which is already being hit by energy prices.
Conclusion
“We have to become more efficient”. Only reliable inspection systems that combine multiple inspection channels with intelligent software can make a decisive contribution to this goal.
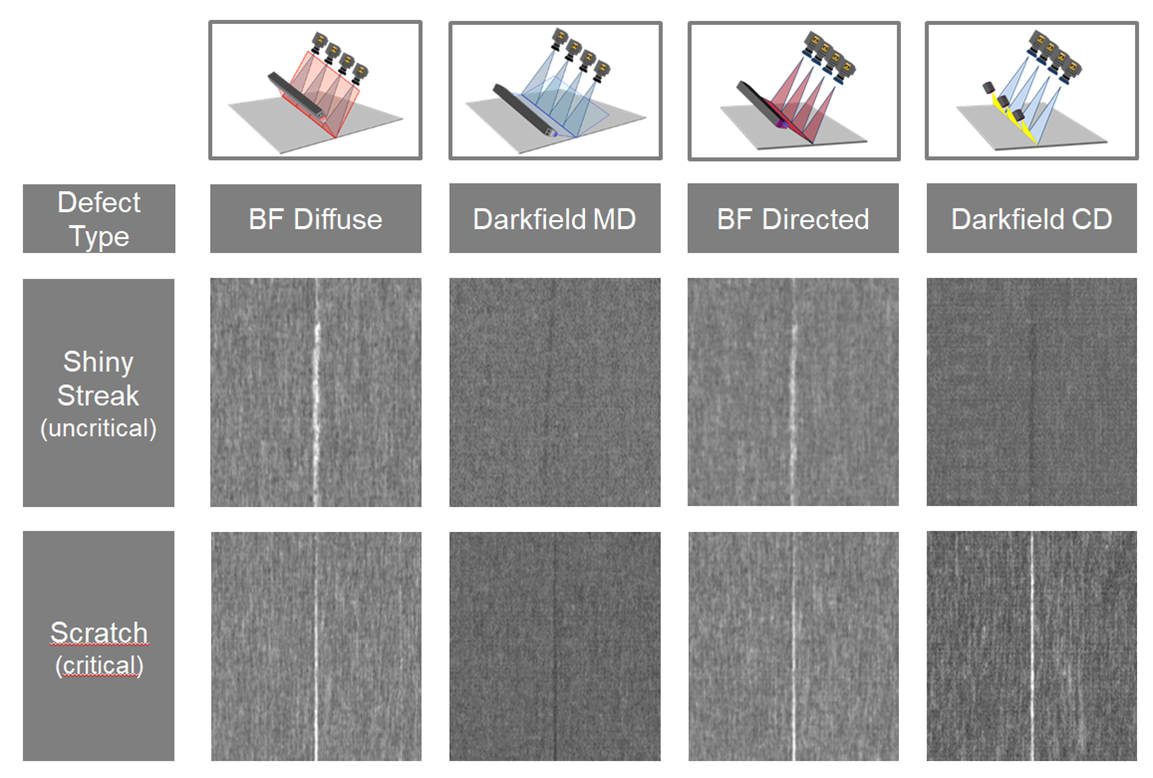
Figure 4: Illustration of two different defects from four different viewing angles. It is clear from the defect images that, in the present case, the critical scratch can only be reliably distinguished from a dirt streak in the dark field in the transverse direction.
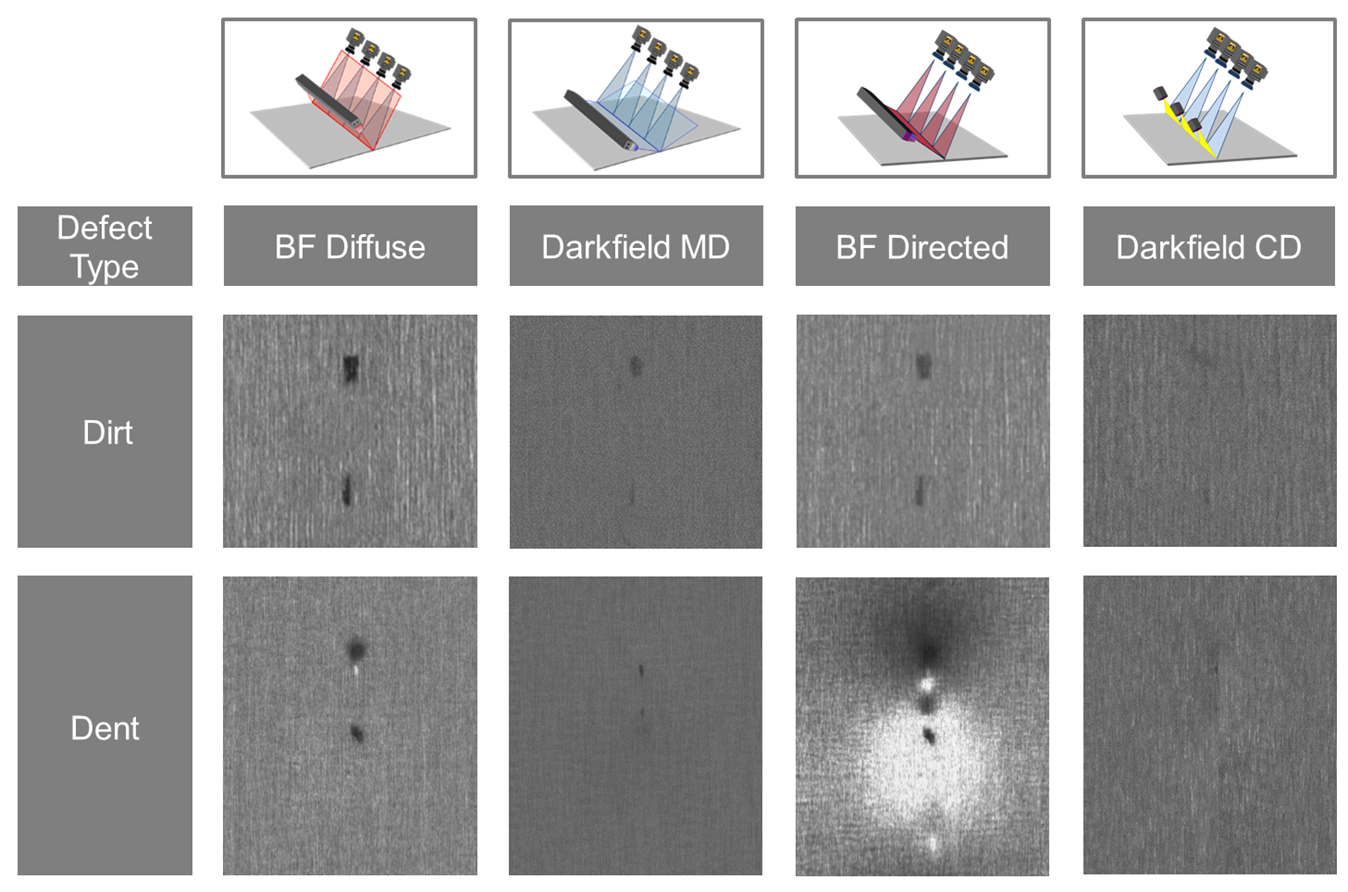
Figure 5: Representation of two different defects from four different angles. It is clear from the defect images that, in the present case, the critical dent can only be reliably distinguished from non-critical contamination when viewed directionally in the bright field.
Find english news on stahleisen.de > here.

